Showing posts with label TASTES. Show all posts

6.27.2014

Picnic-ready Lemon Cake


My friend, Ina*, really never fails me. I can't think of one recipe of hers that I've attempted that wasn't a delicious crowd-pleaser, and I've tried a lot of them!

This yogurt lemon cake is pretty quick, fresh & sweet, and has become my summer al fresco dining go-to dessert. The only trick to it is really keeping an eye on the baking time. In my oven, the edges get golden brown while the center is still very batter-y. I have to watch it from 45 minutes on to catch the moment when a skewer comes out clean and the edges aren't overdone. I like to bake it in a loaf pan lined with parchment paper long enough to fold over and cover the cake when it's cooled and frosted. Tie it up with baker's twine and you're good-to-go... happy picnicking!

Ingredients

1 ½ cups all-purpose flour
2 teaspoons baking powder
½ teaspoon kosher salt
1 cup plain whole-milk yogurt
1 1/3 cups sugar, divided
3 extra-large eggs
2 teaspoons grated lemon zest (2 lemons)
½ teaspoon pure vanilla extract
½ cup vegetable oil
1/3 cup freshly squeezed lemon juice

For the glaze:
1 cup confectioners’ sugar
2 tablespoons freshly squeezed lemon juice 

Make the cake 

 Preheat the oven to 350 degrees. Grease an 8 ½ x 4 ¼ x 2 ½-inch loaf pan. Line the bottom with parchment paper. Grease and flour the pan.

Sift together the flour, baking powder, and salt into one bowl. In another bowl, whisk together the yogurt, 1 cup sugar, the eggs, lemon zest, and vanilla. Slowly whisk the dry ingredients into the wet ingredients. With a rubber spatula, fold the vegetable oil into the batter, making sure it’s all incorporated. Pour the batter into the prepared pan and bake for about 50 minutes, or until a cake tester placed in the center of the loaf comes out clean.

Meanwhile, cook the 1/3 cup lemon juice and remaining 1/3 cup sugar in a small pan until the sugar dissolves and the mixture is clear. Set aside.

When the cake is done, allow it to cool in the pan for 10 minutes. Carefully place on a baking rack over a sheet pan. While the cake is still warm, pour the lemon-sugar mixture over the cake and allow it to soak in. Cool.

For the glaze, combine the confectioners’ sugar and lemon juice and pour over the cake.


*From Ina Garten's Barefoot Contessa at Home 

9.21.2012

Little last-bit-of-summer


I didn't make nearly enough ice cream this summer. Maybe because it just doesn't pack well for a picnic. Or maybe because I have big fall & winter baking plans and was saving it up as a 'garnish' for many cakes... we shall see.

But with a bounty of basil, I was inspired to glean one last flavor gasp of summer: basil ice cream. And, though this may sound a bit strange, it pairs quite well with all of those perfect tomatoes right about now.


2 cups heavy cream*
3/4 cup milk (1 or 2%)
1/2 cup sugar
1/4 teaspoon kosher salt
15 to 20 basil leaves, torn or chopped into 1/8-inch pieces
5 large egg yolks


Yields about 1 quart


1. In a medium heavy saucepan, stir together the cream, milk, half of the sugar (1/4 cup), and salt.  

2. Put the pan over medium high heat. Add the basil leaves to the pan. When the milk just begins to bubble around the edges, remove from heat and cover the pan. Let steep for about 20 minutes, or until a sweet basil flavor has infused into the milk/cream. 

1. In a medium heatproof bowl, whisk the yolks just to break them up, and then whisk in the remaining sugar (1/4 cup). Set aside.

2. Uncover the cream mixture and put the pan over medium high heat. When the mixture approaches a bare simmer, reduce the heat to medium.

3. Temper the eggs by adding about 1/2 cup of the hot cream mixture and, whisking the eggs constantly, add the cream to the egg bowl.  Repeat, adding another 1/2 cup of the hot cream to the egg bowl.  Then, return to the pan of cream on the stove and stir the cream as you slowly pour the egg and cream mixture into the pan.

4. Continue to cook the mixture carefully over medium heat, stirring constantly until the mixture is thickened, coats the back of a spatula and leaves a clear mark when you run your finger across it, 1-2 minutes longer. 

5. Strain the base through a fine-mesh strainer and into a clean container. Cover with plastic wrap and refrigerate the base for at least 2 hours or overnight. 

6. Freeze in your ice cream machine according to the manufacturer’s instructions.  Freeze for at least 4 hours & enjoy!


*I used whole milk instead of cream and added an additional egg yolk for richness, which resulted in a less creamy, more gelato-like texture. 


Slightly adapted from Food52 


6.12.2012

Berry bounty


A weekend trip up to the North Shore for a visit to Russell Orchards yielded a bounty of fresh-picked strawberries, encounters with a few ladybugs, and a fair share of cider doughnut tasting. And then, the brainstorming: what to do with all of these beautiful berries!!?


Obviously shortcakes are in order (and I'm waiting on a batch of crème fraîche to compliment that as we speak) but my immediate thought took me right back to summer at my grandparents' house on the lake where there was always a healthy stash of strawberry freezer jam made from the garden harvest. I'm pretty sure that my grandma Jane used the recipe off of the box of pectin, but I didn't have any pectin on hand and I am much too impatient when faced with a big box of berries and a few empty Weck jars to wait for time to run to the market.


So instead I went with a recipe by another favorite cooking lady, Ina Garten (aka the Barefoot Contessa). Like most of her recipes, it's so simple and so delicious!


Strawberry Jam

2 cups of sugar
1 large lemon, zested and juiced
1 1/2 pints (about 3 cups) strawberries, hulled and halved or quarted

For something a little different than traditional strawberry jam, you might adapt or vary this recipe by adding additional lemon, balsamic vinegar, or a vanilla bean.

Combine the sugar, lemon zest, and lemon juice in a small saucepan and cook over very low heat for 10 minutes, until the sugar is dissolved. Add the strawberries and continue to cook over low heat for 20 minutes, until the strawberries release some of their juices and the mixture boils slowly. Pour carefully into 2 pint canning jars and either seal or keep refrigerated. Use immediately, can or freeze.

I found that, after cooking, my jam was still a bit juicier than I prefer. I spooned the solid bits with some of the juice into jars and then added about a tablespoon of balsamic vinegar to the remaining liquid in the pan. After cooking that down over low heat for about 5 minutes, I bottled and refrigerated it for use as an ice cream topping or to add to salad dressings.

And, ta da... summer in a jar!


5.08.2012

Bread Winner

  
'Inexperienced  housekeepers and amateur cooks will find it a good general rule to attempt at the beginning only a few things, and learn to do those things perfectly. And these should be, not the elaborate dishes of special occasions, but the plain every-day things. Where can one better begin than with bread?
With good digestion, honest personal pride, and the grateful admiration of the family circle as rewards, surely no girl or woman who aspires to responsibilities and joys of home, will shrink from the labor of learning to make bread.'

circa 1887,Dr. A.W. Chase


Much like Dr. Chase's aspirational home-making girl, I recently came to the conclusion that the ability to bake a classic & crusty loaf of bread might be both a necessary and a lovely thing. Bread! The possibilities are endless! But for a weekly loaf that works just as well for breakfast toast as it does for afternoon sandwiches and as a carrier for delicious cheese, I'm hooked on Mark Bittman's wildly popular no-knead recipe and technique.


It's just this easy: combine 3 cups of all-purpose or bread flour*, 1/4 teaspoon dry yeast, 1 1/4 teaspoon salt, and 1 5/8 cups water. The main ingredient for this recipe is time: it does require a bit of planning ahead. After you've combined the ingredients and blended them together until it forms a slightly 'shaggy' ball, the dough should rest, covered in plastic wrap, for 12 to 18 hours in a draft-free area. I like to put the dough in an olive oil coated glass bowl covered with plastic wrap and tuck it away in the microwave (off, of course) while it rises.

*You can play around with different proportions of wheat and white, if you like. My favorite is still the all white bread flour version.

When the dough is ready, flour a work surface and your hands and fold the dough over on itself a few times. Cover it with plastic again and let it rest for about 20 minutes.

After that first little rise, form the dough into a ball and set it on a clean, floured kitchen towel. Coat another towel with a dusting of flour and cover the loaf. Let it rise for about 2 hours.

Preheat the oven to 450 degrees with an 8 quart cast iron lidded pot in the oven as it heats. Let the oven heat for at least a half hour before the loaf is ready to cook. When the loaf has nearly doubled in size and the oven is ready, carefully (very carefully!) remove the pot from the oven and place the dough, with plenty of flour or cornmeal on the bottom of the loaf, into the pan. At this point, I like to cut a short slice into the top to control the cracking and expansion of the loaf, but any pattern or no slice at all will work just as well!

Put the pan with the lid on back in the oven (again, carefully!) and bake for about 30 minutes. Remove the lid and continue to bake for 15 to 30 minutes... in my oven, about 20 minutes with the lid off is enough time for a golden brown loaf with a crunchy crust.

Let cool on a rack for as long as you can wait before slicing into the warm, crusty delicious-ness of it!


3.15.2012

Spring green


A recent trip to Boston's Haymarket (and a steal of a deal on a pillow sized bag of baby spinach) got me thinking outside the basil box when it comes to pesto. I love any greens once they have been thoroughly blended with olive oil, garlic, and parmesan! Arugula, parsley, or some combination of all of the above, will be just as delicious.
The measurements below are just a jumping-off point... keep adjusting to taste as it blends and you really can't go wrong!*

2 cups lightly packed baby spinach leaves (about 2 ounces)

1/4 cup pine nuts, toasted

3-5 cloves of garlic, toasted with the skin on and peeled
2 tablespoons fresh lemon juice

1 to 2 teaspoons grated lemon peel

1/3 cup olive oil

Salt and freshly ground black pepper

1/3 cup freshly grated Parmesan

If you're serving this on pasta right away, boil your noodles and add about a 1/4 cup of pasta water to thin and smooth out the pesto.

Combine the spinach, pine nuts, garlic, lemon juice, and lemon peel in a processor. Lightly pulse. With the machine running, gradually add the oil, blending until the mixture is creamy. Add the salt, pepper, and parmesan and pulse.

*I double this recipe, but never end up using the whole batch right away. I like to freeze about half of it in small portions for later.


1.17.2012

Brunch Brioche

A recent Sunday brunch gave me an excuse to dive (happily) into my flour cookbook. Have I mentioned this delicious collection before? I love the bakeries. I love the book. I love brioche.
And so the recipe of choice was an obvious one: Brioche Au Chocolate!

Please don't be intimidated by things like 'brioche dough' and 'pastry cream'... it all really is more forgiving than you might think... and more delicious.

Just begin with the basic brioche (page 73 in the cookbook):

2 1/4 cups unbleached all-purpose flour
2 1/4 cups bread flour
1 1/2 packages (3 1/4 teaspoons) active dry yeast
1/3 cup plus 1 tablespoon sugar
1 tablespoon kosher salt
1/2 cup cold water
6 eggs
1 cup plus 6 tablespoons (2 3/4 sticks) unsalted butter, at room temperature, cut into pieces

In a stand mixer fitted with the dough hook, combine the all-purpose flour, bread flour, yeast, sugar, salt, water, and 5 of the eggs. Beat on low speed for 3 to 4 minute, or until all of the ingredients have come together. Stop the mixer as needed to scrape the sides and bottom of the bowl to make sure all of the flour is incorporated into the wet ingredients. Once the dough has come together, beat on low speed for another 3 to 4 minutes. The dough will be very stiff and seem quite dry.

On low speed, add the butter one piece at a time, mixing after each addition until it disappears into the dough. Then, continue mixing on low speed for about 10 minutes, stopping the mixer occasionally to scrape the sides and bottom of the bowl. It is important for all of the butter to be mixed thoroughly into the dough.

Once the butter is completely incorporated, turn up the speed to medium and beat for another 15 minutes, or until the dough becomes sticky, soft, and somewhat shiny. It will take some time to come together. It will look shaggy and questionable at the start and then eventually it will turn smooth and silky. Then, turn the speed to medium-high and beat for about 1 minute. You should hear the dough make a slap-slap-slap sound as it hits the sides of the bowl. Test the dough by pulling at it: it should stretch a bit and have a little give.

Place the dough in a large bowl or plastic container and cover it with plastic wrap, pressing the wrap directly onto the surface of the dough. Let the dough proof in the refrigerator for at least 6 hours or up to overnight. At this point, you can freeze the dough in an airtight container for up to 1 week.


And for the pastry cream...

1 1/4 cups milk
1/2 cup sugar
1/4 cup cake flour
1/2 teaspoon kosher salt
4 egg yolks
1 teaspoon vanilla extract

In a medium saucepan, scald the milk over medium-high heat. While the milk is heating, in a small bowl, stir together the sugar, flour, and salt. In a medium bowl, whisk the egg yolks until blended, then slowly whisk in the flour mixture. The mixture will be thick and pasty.

Remove the milk from the heat and slowly add it to the egg-flour mixture, a little at a time, whisking constantly. When all of the milk has been incorporated, return the contents of the bowl to the saucepan and place over medium heat. Whisk continuously and vigorously for about 3 minutes, or until the mixture thickens and comes to a boil. At first, the mixture will be very frothy and liquid; as it cooks longer, it will slowly thicken and become more viscous. Once it thickens, stop whisking every few seconds to see if mixture has come to a boil. If it has not, keep whisking vigorously. As soon as you see if bubbling, immediately go back to whisking for just 10 seconds, and then remove the pan from the heat. Boiling the mixture will thicken it and cook out the flour taste, but if you let it boil for longer than 10 seconds, the mixture can become grainy.

Pour the mixture through a fine-mesh sieve into a small heat-proof bowl. Stir in the vanilla, then cover with plastic wrap, placing it directly on the surface of the cream. Refrigerate for at least 4 hours, or until cold, or up to 3 days.


Bringing it all together...

1/2 of the basic brioche dough
pastry cream
4 ounces bittersweet chocolate, chopped
1 egg

Line a baking sheet with parchment paper or Silpat liners

On a floured work surface, roll out the dough into a rectangle about 20 by 10 inches and 1/4 inch thick. It will have the consistency of cold, damp Play-Doh and should be fairly easy to roll. Position the rectangle so a long side is facing you. Spread the pastry cream evenly over the bottom half of the rectangle. Fold the top half of the rectangle completely over the bottom half, then press down gently so the halves are smooshed together.

Use a bench scraper or a chef's knife to cut the filled dough into 10 pieces, each about 2 inches wide; each piece will be about 2 by 5 inches.

Carefully transfer the brioche to the prepared baking sheet. Cover the pastries lightly with plastic wrap and place in a warm spot to proof for about 2 hours, or until the dough is pillowy.

Position a rack in the center of the oven, and heat the oven to 350 degrees F.

In a small bowl, whisk the egg until blended. Gently brush the tops of the pastries with the beaten egg.

Bake for 35 to 45 minutes, or until golden brown. Let cool on a wire rack for 20 to 30 minutes.

Best served warm or within about 4 hours of baking!


And, a little bit more on the beauty of brioche.

10.28.2011

TRADE secrets


Food lovers (and Food Network fans) all know that Jody Adams has long had a very popular little place in Cambridge called Rialto... one of my favorite places for small plates, a glass of Sancerre and a platter of oysters on a Monday night. Well, now she's got a new spot, right in my neighborhood and just off the Greenway, called Trade.

Lucky me, I was invited by a friend to join him at a tasting lunch there just last week for a very delicious preview. We tried a trio of small plates and love-loved the curried carrots with yogurt cheese and the chicken livers on sesame crackers (with kumquat jam!). I also tried one of the flatbreads, fired up right there in front of you in the brick oven behind the bar, a lamb sausage with eggplant puree, Manchego, peppers and garlic yogurt combo that was a perfect balance of sweet and savory. But my hands-down favorite thing was the dessert: a Taza chocolate budino with sea salt, rosemary and hazelnut wafer... nothing short of fantastic!

It gets even better: the space is lovely, too. Designed by (my master's thesis adviser) Maryann Thompson, the interiors are crisp & clean, with a warmed up relax-and-settle-in feeling and storefront windows looking out onto the Greenway. I'm looking forward to plenty of after work meet-ups there this winter with friends for drinks, a bite to eat, and that budino for dessert!


Curious? They opened this week... you can make a reservation here.
Have a delicious weekend!

8.28.2011

Some other Sunday...


About a month ago (nearly goodbye to August already?) a friend was in town and a few of us made a little pilgrimage to Neptune Oyster in the North End. About the same time last year, on a very hot day, we'd wandered over for a birthday celebration and I am all for making this an (at the very least) annual tradition of feasting and friend-gathering.

It's a tiny & very popular spot, not great for tables of more than 4 or 6, and even if you go at odd hours (say, 3 pm, for example) there is still typically quite a wait on the weekend. But with it's food, great wine selection and white-tiled bistro decor, it's really worth it. And there are plenty of shops and scenic streets to stroll while you wait.

I always order the hot lobster roll: always delicious. If you go, taste test both and have your own debate over the merits of the hot or cold options. We ordered about a dozen oysters, bellinis all around, and settled in to our marble-topped table for a couple of hours of good laughs over good food.

Neptune Oyster
63 Salem Street
Boston, Massachusetts
617.742.3474


'As I ate the oysters with their strong taste of the sea and their faint metallic taste that the cold white wine washed away, leaving only the sea taste and the succulent texture, and as I drank their cold liquid from each shell and washed it down with the crisp taste of the wine, I lost the empty feeling and began to be happy and to make plans.'

- Hemingway

6.04.2011

Clouds in my coffee...


In spite of my focused & clearly-seduced-by-the-marketing-strategies-of-Starbucks desire for a personalized gold card (hard earned by friends like Joe & Kellyn), I typically make my morning coffee at home. Sometimes (okay, most of the time) I'm in a bit of a rush and fill my travel mug as I head out the door, but lately I've been making a little more time for my addiction of choice and I owe it all to the Bodum battery operated milk frother. It's really a ridiculous little gadget and, in theory, I am opposed to having a bunch of little single task appliances taking up space in the kitchen. But the reality is (and I'm admitting it here for the first time) that I have loads of little, single task, but oh-so-useful kitchen tools. Sometimes they are so magical that it is completely worth the space that they consume, and this is one of those times.

Is it quite clear how much I'm enjoying my homemade hybrid latte-mistos? So much easier and less clean up than busting out the cappuccino maker... just a cup with an engineered lid that quickly foams the milk (I like a combo of low-fat with a splash of Boathouse Farms Vanilla Chai Tea for a little sweetness) to nearly double its volume, radically transforming your morning cuppa in a snap!* This is really going to throw a wrench in my Starbucks gold card aspirations...

The Bodum milk frother, in lime green: my new morning ritual.

The whole Bodum Bistro line is pretty fun, with it's scaled-up logo, LEGO-like texture and pop-y colors.*


* I realize that this is all sounding a bit advertisement-esque, but none of these companies pay me a penny to say anything about any of this!

5.23.2011

Almond Cookies with Chocolate Sea Salt Ganache

Delicate & rich cookie sandwiches*

It's finally spring here in Boston after a very, very long New England winter. You'd think that I'd be switching up the comfort food & baking for lighter, healthier fare but, despite what it says on the calendar, we have been socked in by grey fog and rain for the better part of the past few weeks. The prolonged winter/delayed spring has kept me in baking mode, which is actually sort of fine by me because I still have so many recipes from Joanne Chang's beautiful flour bakery cookbook to test and taste. A couple of my favorites already are the beloved home made oreos (page 134 in the flour cookbook) and the so, so easy brown butter rice crispy treats, worth making if only to prove for yourself that brown butter is a bit of magic!

For a friend's baby shower a couple of weekends ago, I wanted to make something a bit more girl-y & refined and the Almond Macaroons with Bittersweet Chocolate Ganache (a combination of my favorite flavors!) seemed like just the thing. I have to say up front that my results didn't seem quite as 'macaroon-y' as I had hoped: the cookie was more like a thin almond crisp. Still delicious, but different, and the reason why I've renamed the recipe in this post. The only real adaptation that I made was too add sea salt to the ganache simply because I had sea salt on hand and I love the chocolate-sea salt flavor combination. In the end, these cookies were pretty delicious and much easier to make than I would have guessed when first perusing the recipe. So, don't be intimidated by the words 'ganache' or 'macaroon'... bake up a batch and let me know what you think!


ALMOND COOKIES

3 1/4 cups (520 grams) blanched almonds**
2 2/3 cups (540 grams) sugar
6 egg whites***
2 teaspoons almond extract
1/4 teaspoon kosher salt

CHOCOLATE GANACHE

8 ounces (228 grams) bittersweet chocolate (about 70% cacao), chopped
1 cup heavy cream
2 teaspoons sea salt (or more, to taste)


Preheat the oven to 350 degrees F. Line a baking sheet with parchment paper or Silpat liners.

In a food processor, pulse the almonds until ground to a fine powder. Stop grinding once they are powdery but before they start to clump together and become more of a paste. Remove about 1 cup of the ground almonds from the food processor and set aside. Add the sugar to the almonds left in the food processor and process for 10 to 15 seconds, or until the sugar is completely incorporated. Add the egg whites and continue processing for about 30 seconds or until well combined.

Transfer the almond paste to a medium bowl, and fold in the reserved ground almonds. Fold in the almond extract and salt.

Use a small spoon to make walnut-sized rounds of batter to the baking sheet. It's a bit tricky to get such small rounds, but it's important to keep them small and spread out (about 2 inches apart), because the batter flattens and spreads quickly!

Bake for 20 to 25 minutes (keep an eye on them... timing can really vary!) until the cookies are a light golden brown around the edges. Let cool completely on the baking sheet. They are very sugary, and it is much easier to transfer them from the pan to the rack if they are cooled.


For the ganache:
While the cookies are cooling, place the chocolate in a medium heat-proof bowl. In a small saucepan, scald (bubbling around the edges, but not boiling) the cream over medium-high heat
and pour over the chocolate. Let sit for 30 seconds, then slowly whisk the chocolate and cream together until it is completely mixed and the mixture is smooth. At this point, I stirred in about 2 teaspoons of seasalt. It's important to taste test, as sea salt intensity can really vary! Let cool at room temperature or in the refrigerator for at least an hour... the ganache should be thick and spreadable. The ganache can be made ahead of time and stored in the fridge for up to two weeks (and probably would be delicious melted over ice-cream!).

Remove the cookies from the rack. Spread about 1 tablespoon of the ganache on the flat side of one cookie. Top with a second cookie, flat side down, to make a cookie sandwich. You should have over 20 cookie sandwiches, total.

The cookies can be stored in an airtight container at room temperature for up to 3 days.

Enjoy!


* The grey weather is not helping to get an appetizing image of these cookies... trust me: they taste better than they look!
** I didn't have enough blanched almonds, but I did have raw and so I googled methods to blanch my own: easier than I would have imagined!
***You can use the left over egg yolks to make ice-cream to serve with the delicious little cookies!


9.25.2010

Easy Being Green


Toasted Nut & Parsley Pesto

2 cups loosely packed fresh flat-leaf parsley
1 cup walnuts or a combination of walnuts, almonds & pecans
3/4 cup freshly grated Parmigiano Reggiano
3-5 cloves of garlic
1/2 cup extra-virgin olive oil or walnut oil
2 tsp fresh lemon juice
kosher salt
pepper

1. With the peel on, lightly toast the garlic cloves, let cool and peel.
2. Toast the nuts until fragrant.
3. Combine parsley, nuts, garlic, cheese and 1 tsp salt in a food processor.
4. Turn on the processor and slowly add oil through the feed tube. Process mixture into a thick paste, but don't over process!
5. Add lemon juice, pasta water (about 1/4 cup). Season with salt and pepper to taste and pulse food processor a couple of times.

This pesto is delicious on pasta (I especially like it on spinach noodles), but is also tasty on crostini, as a seasoning for grilled shrimp, or combined with 1 cup of unsalted butter in a food processor to make a herb-nut compound butter.

9.12.2010

Pistachio-Saffron-Rosewater Ice Cream

One of my favorite cookbooks is SPICE from Ana Sortun {the chef at Oleana and Sofra in Cambridge, Massachusetts}. Looking for an ice cream recipe with flavors that would compliment her recipes, I found a few variations on pistachio that I thought might be perfectly delicious. I've combined and adapted a few of them for what I think is a good balance of flavors with just enough of the flowery rosewater essence to bring to mind a more exotic place and time. A great finish to a spicy Mediterranean meal!

Ingredients:
1 cup cream
1 cup half and half
1 heaping teaspoon saffron threads
1/2 teaspoon vanilla
6 egg yolks
1 cup superfine sugar
1/3 cup rosewater
1 cup pistachios, crushed or chopped to small pieces


1. Heat cream, half and half, saffron, 1/2 cup chopped pistachios and vanilla to just boiling, being careful not to overcook. While the cream mixture is coming to the boil, whisk yolks with sugar in a metal bowl.
2. Pour about 1/2 cup of the hot cream mixture into yolks in a slow, steady stream, whisking all the while. Don't stop whisking. Let it cool a bit by whisking for another 3 to 4 minutes.
3. Pour the egg mixture into the remaining cream mixture and cook over low-medium heat until the custard thickens and coats the back of a wooden spoon, stirring constantly.
4. Strain the custard, removing the steeped pistachios, and cool in the refrigerator (overnight is best but 4-6 hours will do). When you are ready to make the ice cream, stir in the remaining 1/2 cup of chopped pistachios and pour all of the custard into an ice cream maker; freeze according to manufacturer's directions and let set for at least 6 hours.

Garnish with finely chopped pistachios

9.06.2010

Hey there, Cupcake

I know, I know, this whole cupcake trend has been around for ages... but there is still something so valid, so perfectly proportioned & autonomous about the cupcake. And, I shouldn't neglect to mention, these years of cupcake craze have certainly raised the bar. No more dry and bland cake topped with overly sweet and slightly crumbly frosting for us.... we've become a pretty picky bunch.

After getting briefly caught up in Magnolia Bakery fandom (and, I admit, I still love strolling through the West Village on a summer evening to grab an after dinner dessert when in NYC) my current favorite cupcake recipes are by my dear friend and former classmate Ming Thompson of mingmakescupcakes fame. The flavor combinations are well-balanced and innovative... never too sweet... and are easier than they look to recreate at home. Ming is surely destined for stardom, both culinary and design-wise, so take a peek at her latest confections and say you knew her when.

ming makes cupcakes


5.02.2010

Walnut-Orange Cake with Olive Oil

I hosted a little birthday celebration for a friend of mine who is a bit of a health nut. As a health(ier) alternative to a traditional birthday cake, I made this walnut-orange cake for dessert. It uses olive oil instead of butter and the finely chopped walnuts give it a hearty texture. Plenty of orange zest helps the citrus flavor hold up to baking, and lightly sweetened Greek yogurt has a tanginess that compliments that tastes and textures of the cake.

A dessert to enjoy, guilt free. Trust me... it's good for you!


Walnut-Orange Cake
1 1/2 cups chopped walnuts
1 cup all purpose flour
1 tablespoon baking powder

4 large eggs
1 1/2 cups sugar
1/2 cup fresh orange juice
1 tablespoon finely grated orange peel
1/2 cup olive oil

Powdered sugar
Greek yogurt

Preheat oven to 350°F. Prepare a 9-inch-diameter springform pan with olive oil. Place parchment paper round in bottom of pan and oil the paper.

Grind walnuts in processor until finely ground but not powdery or chop finely. Combine ground walnuts, flour, and baking powder in medium bowl; set aside.

Using electric mixer, beat eggs in large bowl until frothy, about 2 minutes. Gradually add sugar, beating until light, thick, and pale yellow, about 4 minutes. Gradually add walnut-flour mixture; then add orange juice, orange peel, and olive oil, beating just until blended. Transfer batter to prepared pan. Place pan on rimmed baking sheet, and bake cake until tester inserted into center comes out clean, about 1 hour. Cool cake completely in pan on rack.

Release pan sides. Carefully invert cake onto platter and remove parchment paper. Once the cake has cooled well, sprinkle it with powdered sugar.
Combine 2 cups of Greek yogurt with 3 tablespoons of powdered sugar and mix together until smooth. Serve with the cake as an alternative to whipped cream and garnish it with orange zest.
Adapted from Bon Appétit October 2007

4.05.2010

Easter eggs

The weather here in Boston feels like it might be springing right into summer, which made Easter Sunday perfect for dining al fresco and inaugurating my friend Sara's yard for another season.

For this Easter brunch I decided to try my hand at deviled eggs... an old standby that I love but have never actually made! Thought that I'd start out with a couple of variations on the traditional, adding bacon to one batch and horseradish to another, giving them both a little something extra.

The eggs were added to a feast of delicious Easter dishes followed by a multiple course dessert of the amazing things that can be made with strawberries. Happy Easter and welcome spring!

Bacon & Eggs

6 eggs
1/4 cup mayonnaise
2 slices of bacon
1/2 tablespoon mustard
dash of paprika
  1. Place eggs in a saucepan, and cover with cold water. Bring water to a boil and immediately remove from heat. Cover, and let eggs stand in hot water for 10 to 12 minutes. Remove from hot water, and cool. To cool more quickly, rinse eggs under cold running water.
  2. Meanwhile, place bacon in a large, deep skillet. Cook over medium-high heat until evenly brown. Alternatively, wrap bacon in paper towels and cook in the microwave for about 1 minute per slice. Crumble and set aside.
  3. Peel the hard-cooked eggs, and cut in half lengthwise. Remove yolks to a small bowl. Mash egg yolks with mayonnaise, crumbled bacon. Stir in mustard. Fill egg white halves with the yolk mixture and garnish with finely crumbled bacon. Refrigerate until serving.

Extra Devilish Deviled Eggs

6 hard-boiled eggs
1/4 cup mayonnaise
1 tablespoon prepared horseradish
1/2 tablespoon chopped fresh dill
1/4 tablespoon mustard
1/8 teaspoon salt
dash of freshly ground pepper
dash of paprika
  1. Cook eggs as described above. Cut eggs in half lengthwise. Remove yolks; set whites aside.
  2. In a bowl, mash the yolks. add mayonnaise, horseradish, dill, mustard, paprika, salt and pepper; mix well.
  3. Pipe or spoon into egg whites. Garnish with chopped dill. Refrigerate until serving.


Sara's lovely al fresco table


Strawberry-fest: Ming's almond strawberry layer cake (above) & Erin's berry tart with rosemary crust


Thanks to Ming for sharing the beautiful photos!

4.03.2010

Comfort me with popsicles


I know that it's not quite summer yet, but these warmer days are getting me thinking about new ice cream recipes for the season. As an easy, pre-summer treat I've been making popsicles. It's amazing how having a popsicle on a warm day (or even a cold, sick-at-home day) can bring back happy childhood memories... it's no coincidence that the popsicle was invented by an 11 year old boy! For a slightly more grown-up take on the frozen treat, I've been combining grapefruit juice and elderflower syrup from Ikea in a make-at-home popsicle tray. The elderflower sweetens up the citrus and combines to create a perfect fruity floral flavor. The ratio of juice to syrup is up to personal preference, but I've found 1 part syrup to 4 parts juice to be a pretty good recipe. If you want to kick it up a bit, St. Germain elderflower liqueur could replace the syrup... definitely grown up!*

*Another 'grown up' summer recipe for elderflower syrup:
Hendrick's gin
elderflower syrup
soda
cucumber garnish

3.27.2010

Ladies who brunch

The ladies that I worked with at a Cambridge architecture firm have instituted a long-standing, monthly potluck get together. The hostess, theme, and location is on a loosely rotating schedule and this week it was brunch at Sydney's lovely home. As is customary with this crew, the food was fantastic and the laughs were plentiful.
My culinary contribution to the feast was two variations on my favorite apricot-sage scones: one batch of pecan-rosemary and one batch of cherry-almond. Delish, if I do say so myself!

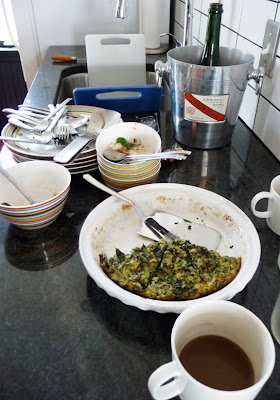
Post-brunch clean up... thanks Sydney!


3.18.2010

tastes: Milk Candy

My new favorite treat can be acquired, thank goodness, not far from where I live. It's a perfect combination of milk and toasted almond and reminds me of one of my favorite ice cream recipes. Such wholesome flavors, I fool myself that they are actually nutritious! The sweet little individual wrappers are decorated with cow spots and cartoon cows in muted colors. I get mine by the bag ($2.50 for 10 pieces) at the 101 Bakery in Boston's Chinatown. In addition to my favorite candies, they also have a wide array of sweet and savory treats, charmingly efficient displays, and irresistible individual cakes.


3.15.2010

Frosted Chocolate-Almond Cookies

A hearty little dessert that is more like a mini-cake, these cookies can be made even easier by substituting a jarred spread for the frosting. I used Le Pain Quotidien's white chocolate Blondie, but a hazelnut spread or Nutella (with chopped hazelnuts instead of almonds in the cookie) would be delicious, as well. Any flavors that pair nicely with chocolate would work as a lovely variation on a theme.*


COOKIES
2 1/4 cups all-purpose flour
1 cup (2 sticks) butter, softened
1 cup sugar
1 egg
1 tsp vanilla extract
1/4 tsp almond extract
3 oz semi-sweet chocolate
1 tsp baking powder
1/4 tsp salt
1/2 raw almonds, chopped

Preheat oven to 350 degrees.
Mix butter and sugar in the bowl of a mixer at high speed until fluffy.
Mix in egg and extracts mixture.
Combine melted chocolate and mix well.
Combine flour, baking powder and salt. Mix well.
Cover and chill for about 2 hours or until firm.


WHITE CHOCOLATE FROSTING
5 oz good quality white chocolate, chopped and melted
1/2 cup (1 stick) unsalted butter, room temperature
A pinch of salt
1/2 tsp vanilla extract
1/4 cup sour cream

Mix together thoroughly.
Allow cookies to cool to room temperature before frosting.
Garnish with finely chopped raw almonds.

*Orange instead of almond...
Substitute 1 T orange zest and 2 T orange juice for almonds in the cookie dough. Garnish with finely chopped orange zest.


3.12.2010

the dinner party

"Life is too short to drink bad wine or have
meals with people you don't like."

Mireille Guiliano


The return of the dinner party has been one of the surprisingly wonderful social shifts of late.
It's the perfect testing ground for experimenting with recipes that I otherwise would never get around to. And time with friends, eating and drinking around the home dining table, has quickly become one of my favorite ways to spend an evening. I now prefer it to going out for dinner. Unless, of course, it is someplace truly amazing...


Related Posts with Thumbnails